

From Google Earth to Rope: Simple Hacks To Measure for Outdoor Lighting
By Hagan Schmidt, COO & Lighting Expert – 06/27/25

A great lighting project starts with a plan. Before you choose your lighting products or climb a ladder, it’s worth taking a few minutes to figure out exactly how much lighting you need. A little upfront measuring saves you from mid-project surprises, like running short, overordering, or realizing you forgot to account for that second-story peak. In this guide, we’ll walk you through how to measure accurately. We have tips that will help with using everyday tools and even a few techniques the pros rely on. Let us guide you to take on your lighting project with clarity and confidence.
Why Measuring First Matters
Lighting is linear, which means every foot counts. If you guess the measurements, you risk awkward gaps, unnecessary overlaps, or running out of product halfway through. Measure first and you’ll:
- Order the right length of lighting, no more, no less
- Know how many mounting clips, end caps, or connectors to buy
- Avoid returns, delays, and re-dos
Think of this as the pre-game that makes the whole job smoother.
Surface Types and How to Measure Them Safely and Accurately
| Surface Type | What Makes It Tricky | How To Measure It Right |
|---|---|---|
| Rooflines & Edges | Peaks, gables, and overhangs add height and angles you can’t see from the ground. | Use Google Earth or a laser distance measurer as a simple, safe, way to measure verticals and above ground elements. |
| Columns & Posts | Tight spirals vs. spaced out wraps drastically change the footage needed. | Measure the height and circumference. Estimate spacing between wraps—tighter wraps mean more footage. |
| Trees | Trunk size, height, and how many branches you wrap adds up quickly. | Measure trunk height × circumference. For branches, estimate average length and circumference × count. |
| Stairs | Lighting handrails, treads, or risers all require different approaches. | Decide what you're lighting; if you’re lighting steps, then measure the width or height × number of steps. |
| Lawns & Fences | Curves, corners, and garden borders can eat up more footage than expected. | Lay out a string or hose along the path, then measure that for an accurate length. |
| Commercial Façades | Combining flat surfaces, trim, signage, and vertical drops creates complexity. | Break each section into rectangles and add it all up. For corners, be sure to add connectors. |
How to Measure: Tools & Tactics
You don’t need fancy gear. But, if you have it, it's great. Here's how to measure accurately using whatever tools you’ve got access to.
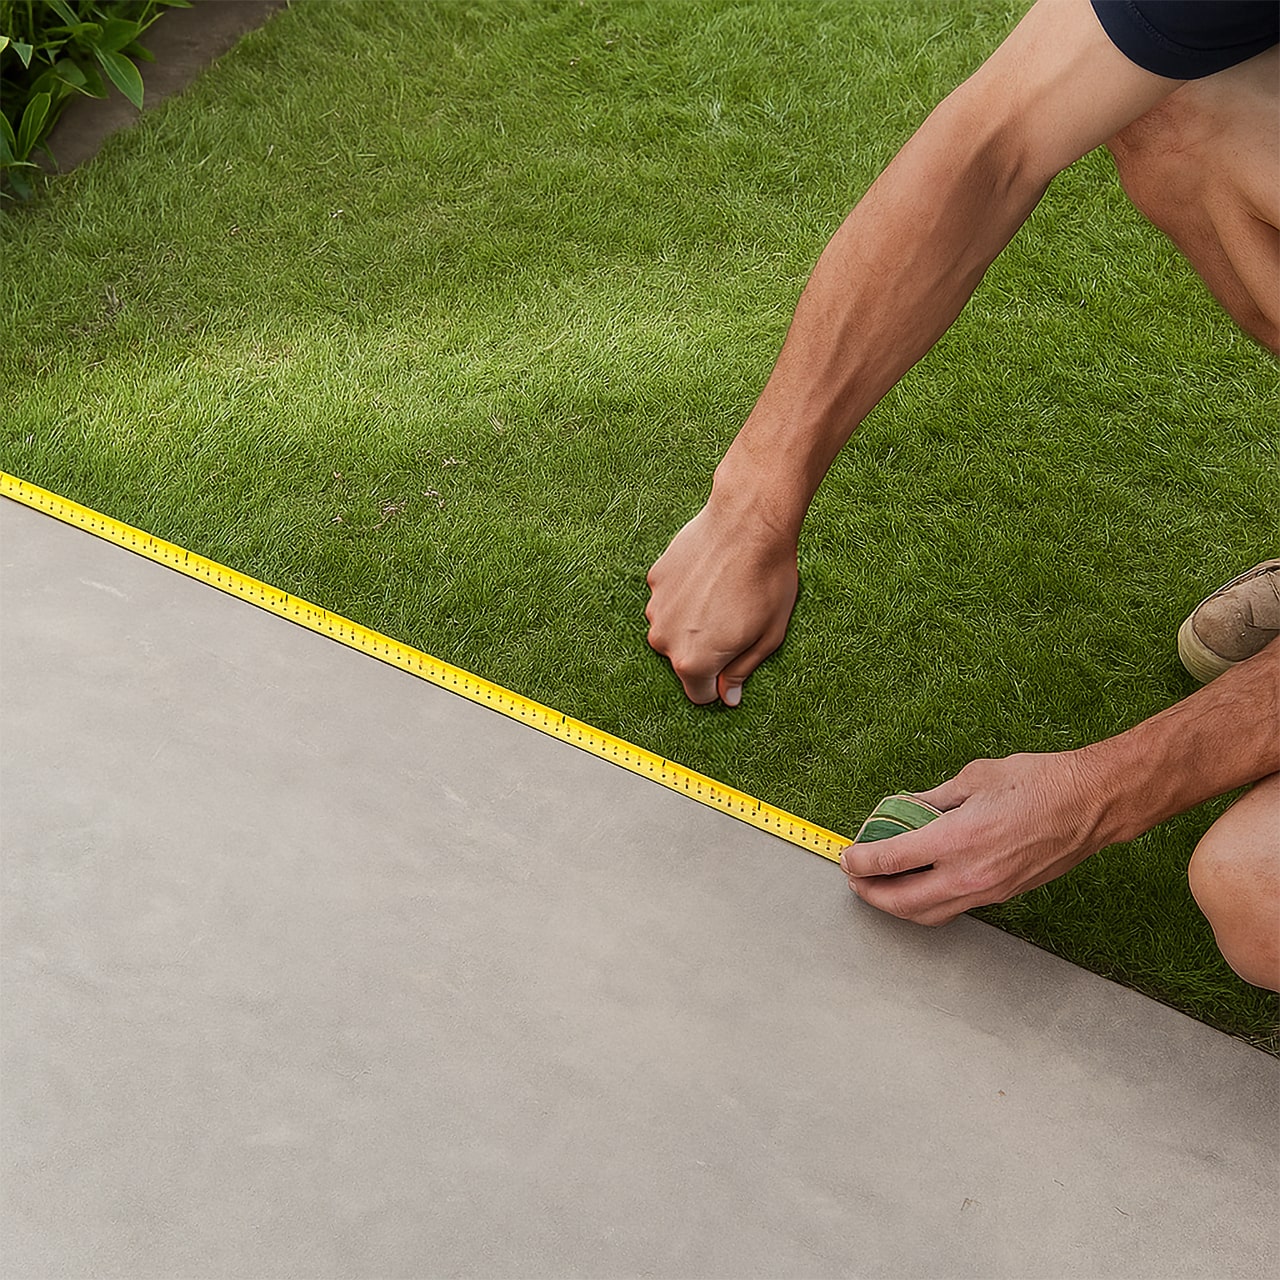
Tape Measure
Best for: Short runs, ground-level installs, curved or physical surfaces.
The tape measure is still the most reliable tool for hands-on, up-close lighting plans. It’s especially useful when you're dealing with surfaces you can physically reach.
How to use it:
- Use a rigid steel tape for straight edges like porch rails, stair treads, or deck ledges
- Use a soft, flexible tape to wrap around tree trunks, columns, or curved planters (if you don’t have a flexible tape, wrap with a rope and measure the rope)
- Measure in sections, keeping notes for each run
- Always round up and add 10–15% for slack, bends, and clean transitions
- Pro Tip: Try convenient No-Wrap Straps for columns and trees.
Use it for:
- Staircases (treads, risers, or under-rail lighting)
- Columns and porch posts
- Window and door frames
- Interior shelves, mantels, or accent areas
- Tree trunks and small landscape features
Limitations:
- Limited reach, requires physical access to the full length you’re measuring
- Can be awkward for large outdoor features like tall fences or multi-story buildings
- Time-consuming for complex layouts or long runs
When not to use it:
- For anything above ground level that would require a ladder
- For long horizontal spans where a digital or satellite tool would be faster
- In cases where the structure is inaccessible, unsafe, or irregular in shape
Birddog Tip
Measuring with a tape measure is perfect for tight, detailed work. Especially around architectural accents, tree wrapping, and spiral runs where you need precision. For everything else, consider using satellite or laser tools to speed things up and stay safe.
Google Maps or Google Earth
If you want to measure without pulling out a ladder or pacing your property, Google’s mapping tools let you trace lighting paths from a satellite view. Both are helpful, but they’re designed for different levels of complexity.
Best for: Estimating long, horizontal runs—like rooflines, fences, driveways, or lawn perimeters
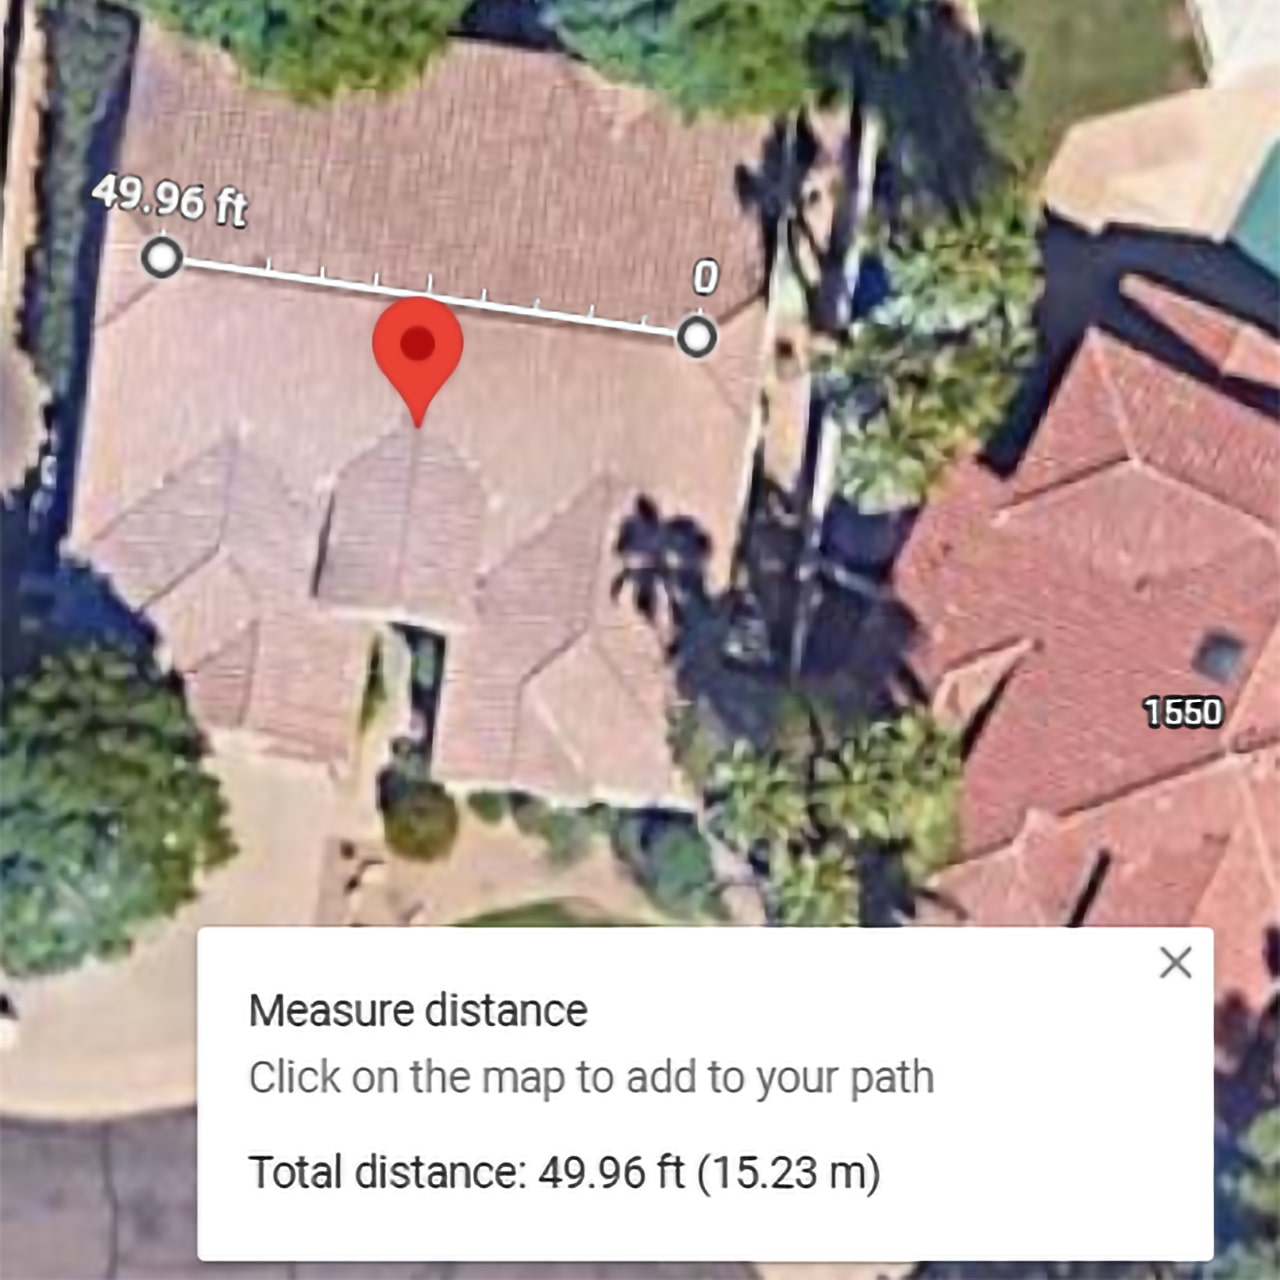
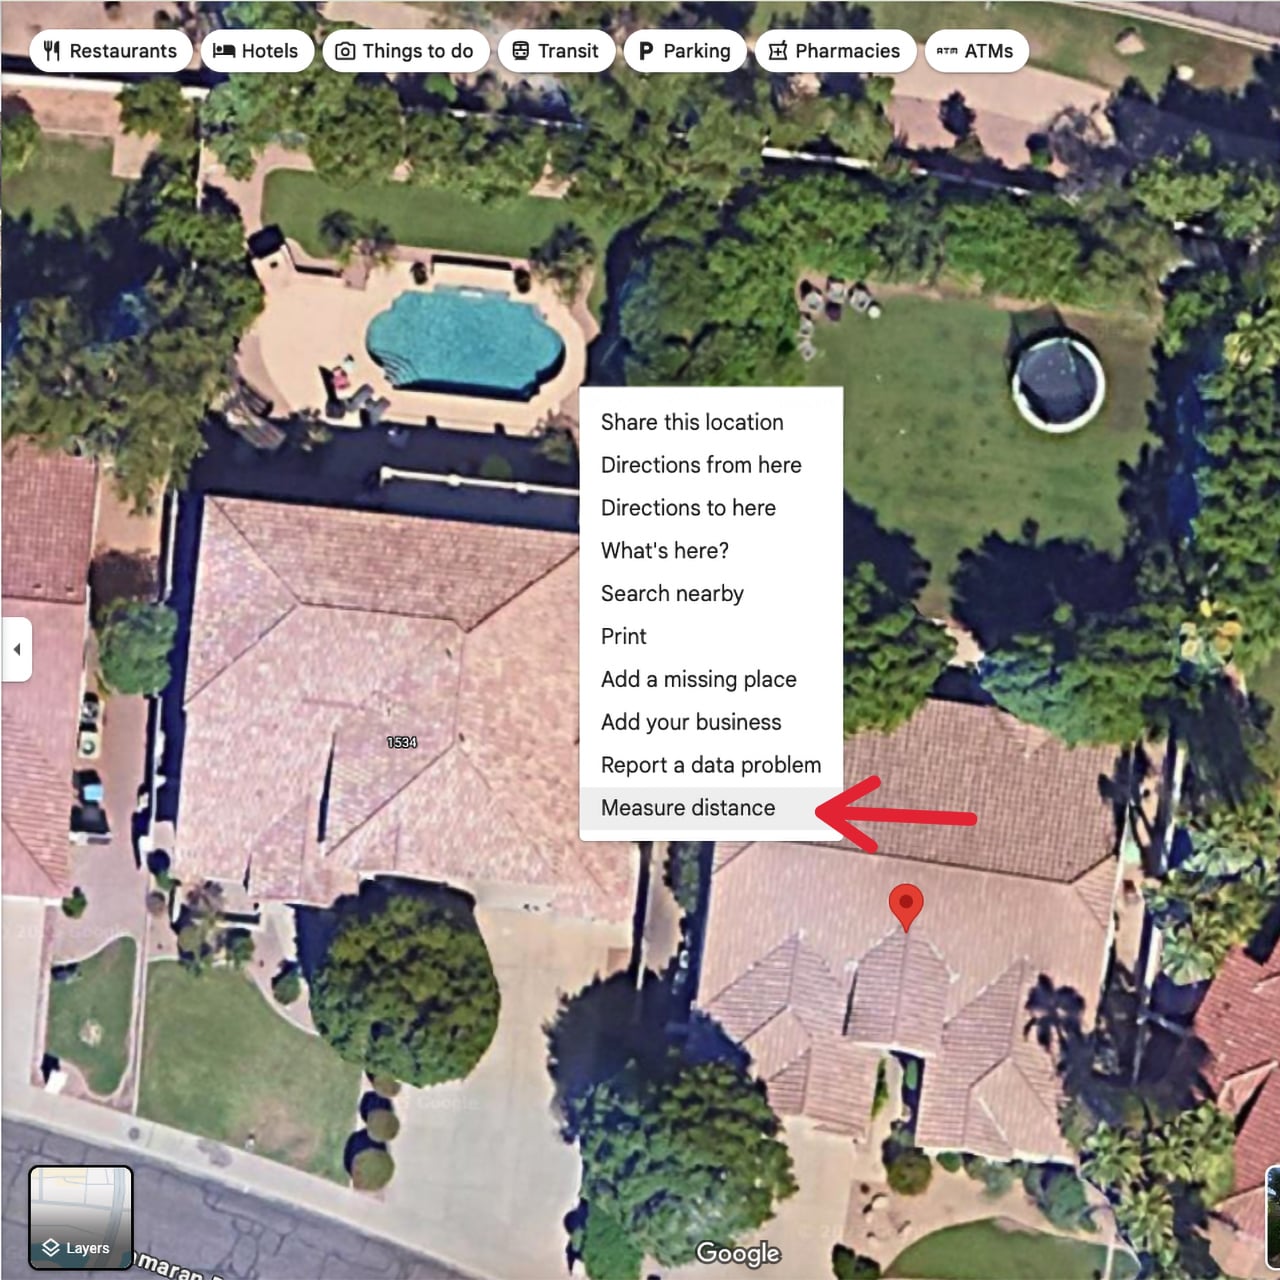
Google Maps (Satellite View)
Quick, browser-based, and easy to use.
Perfect for getting a fast estimate on straightforward layouts.
How to use it:
- Go to maps.google.com and switch to satellite view
- Right-click anywhere and select “Measure distance”
- Click along your roofline, fence, or lawn edge
- The total footage appears at the bottom of the screen
Use it for:
- Residential ridgelines and roof edges
- Walkways and driveways
- Fences, patios, and lawn borders
Limitations:
- Only measures flat distances
- No support for elevation or multi-story features
- Can’t show slope, depth, or vertical structure
- Satellite images might not be up to date
When not to use it:
- Gables or angled rooflines
- Second-story runs
- Anything with height or complexity
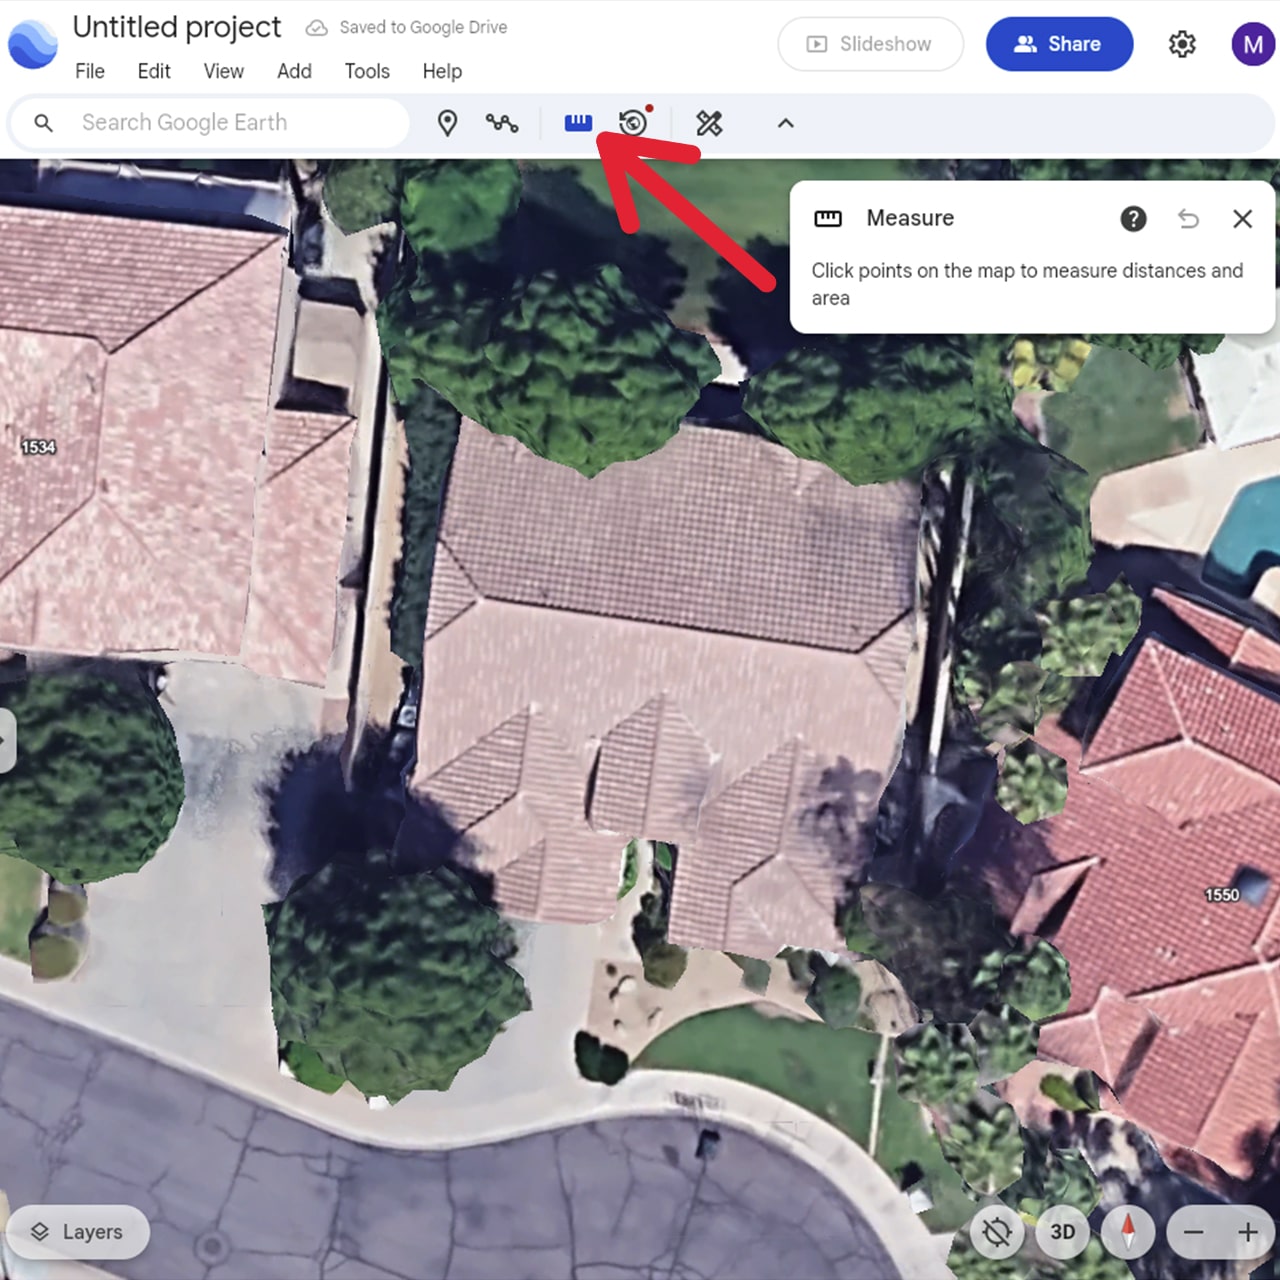
Google Earth (Web or Desktop App)
More flexible, better for complex or multi-level projects.
Use this when your layout includes elevation, varying roof heights, or unique structures.
How to use it:
- Open Google Earth in your browser, or install the desktop version
- Search your address and zoom in
- Click the ruler tool to start measuring
Use it for:
- Commercial buildings and storefronts
- Rooflines with gables, peaks, or dormers
- Large-scale or multi-zone lighting installs
Limitations:
- Slightly more complex to use
- Requires a stable internet connection (or the desktop version)
- Still doesn’t measure true vertical distances, just elevation across terrain
- May not be current
When not to use it:
- Small jobs or quick estimates
- For measuring something at ground level
Birddog Tip
Use Google Maps for fast, flat layouts like driveways, fences, and roof edges.
Use Google Earth when you’re lighting something that spans height, slope, or scale. And whichever tool you choose, always add 10-15% extra for slack, connectors, and flexibility once you’re actually on-site.
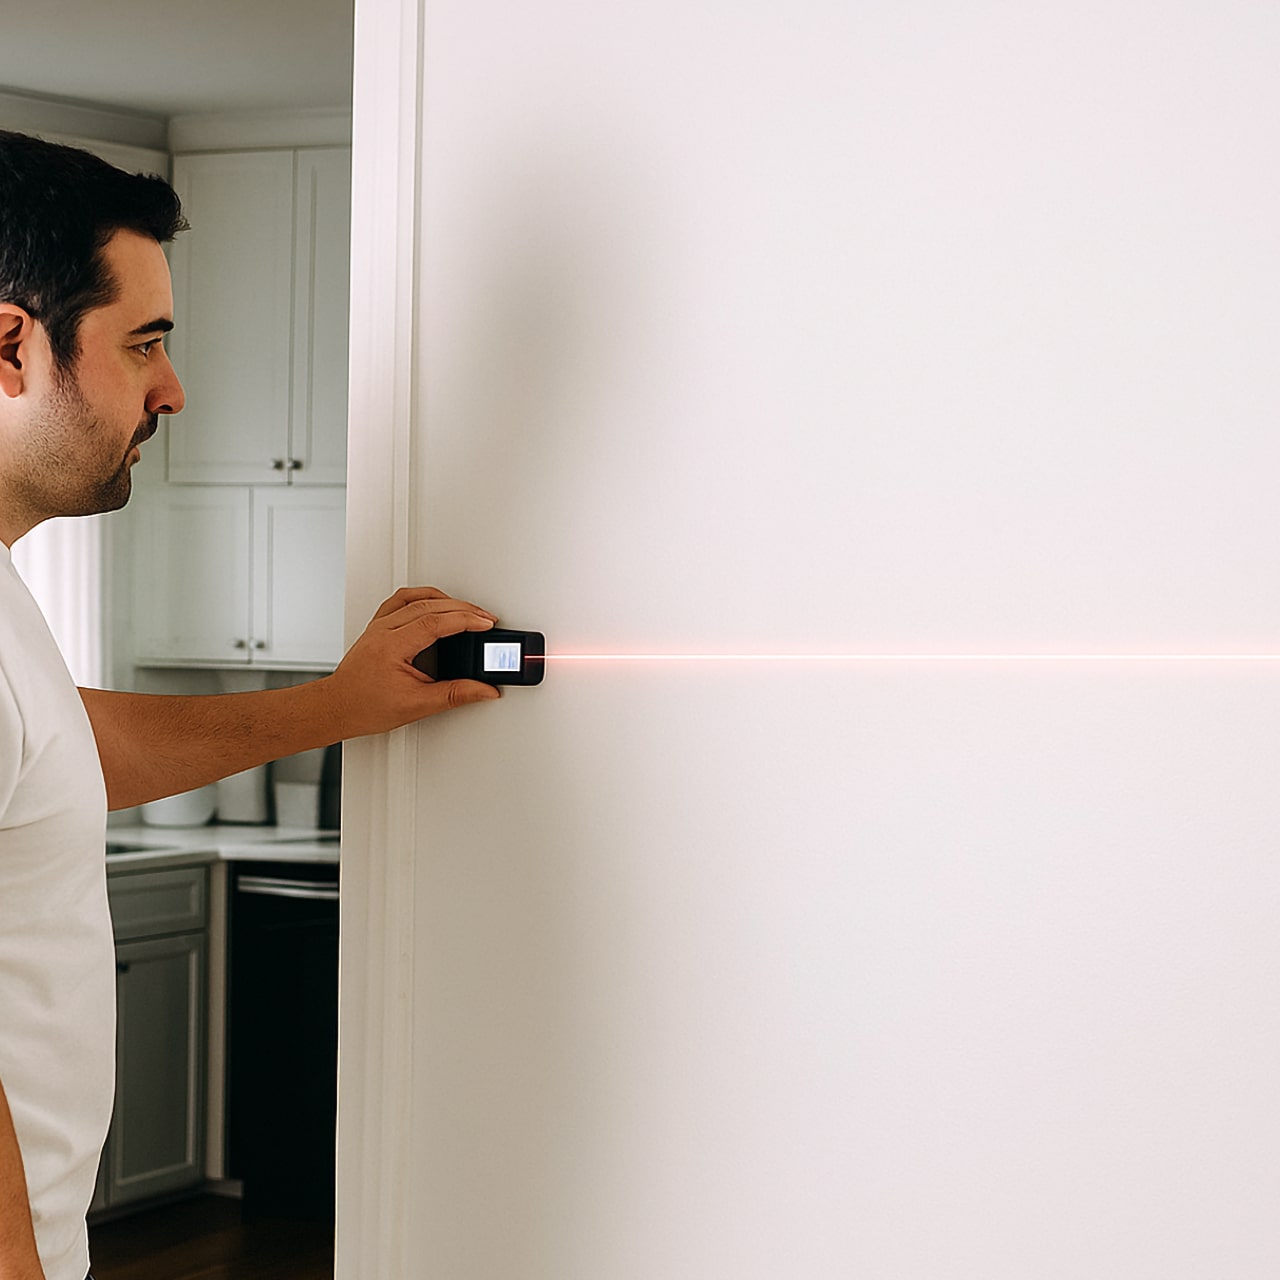
Laser Distance Measure Tool
Best for: Vertical runs, trees, gables, tall structures
A laser distance measure tool is a handheld tool that measures the distance between you and a specific point using a laser beam. It’s fast, safe, and especially useful when you can’t reach the top of what you're trying to light, like a roof peak, sign, or tree canopy.
How to use it:
- Stand at the edge or base of the object or structure you're measuring
- Aim the rangefinder at the highest or furthest point you want to light (e.g., gable peak, tree branch, sign edge)
- Press the button and record the distance on the display
- Repeat for each element as needed
Use it for:
- Roof peaks and multi-story gables
- Trees, especially when wrapping trunks or lighting canopies
- Commercial signs, awnings, and storefronts
- Tall columns, flagpoles, or vertical façade lighting
- Calculating elevation change between two ground points
Limitations:
- Line-of-sight only, as it won’t work well with obstructions or dense foliage
- Doesn’t measure curves or circumference (you’ll need a flexible tape for spiral wraps)
- Not useful for angle calculations
When not to use it:
- Ground-level spaces where a tape measure is quicker
- Measuring around curves or irregular shapes
- Locations with visual obstructions or highly reflective surfaces
Birddog Tip
Use a laser measuring tool to get vertical numbers, especially when you’re planning lighting for tall structures, trees, or commercial signage. Then pair it with Google Maps or Earth for the horizontal layout. Together, they give you a complete picture of how much lighting you need.
Final Tips
- Always round up, especially if you’re using cuttable lights.
- Don’t forget the accessories: clips, controllers, waterproofing kits, and extra connectors.
- Most rope, strip, and neon lights include “cut points”, places you can cut the light to customize it to your space. Make sure your planned length aligns with those intervals.
Done Measuring? Let’s Get You Glowing.
Ready to bring your lighting vision to life? Once you've measured and mapped out your project, explore our full range of lighting solutions to find the perfect fit:
- LED Rope Lights – Flexible, durable, and ideal for outlining architectural features or creating ambient glows.
- LED Strip Lights – Versatile and sleek, perfect for under-cabinet lighting, accent walls, or detailed installations.
- LED Neon Lights – Achieve the classic neon look with energy-efficient LED technology, great for signage and bold designs.
- LED String Lights – Add charm to patios, gardens, or events with our wide selection of string lighting options.
- LED Holiday Lights – Celebrate the seasons with our extensive collection of festive lighting decorations.
At Birddog Lighting, we’re here to help you every step of the way. From precise measurements to selecting the right lighting products. Let’s make your project shine!