


7 Common Installation Mistakes to Avoid with LED Rope Lights
By Hagan Schmidt, COO & Lighting Expert – 07/31/26
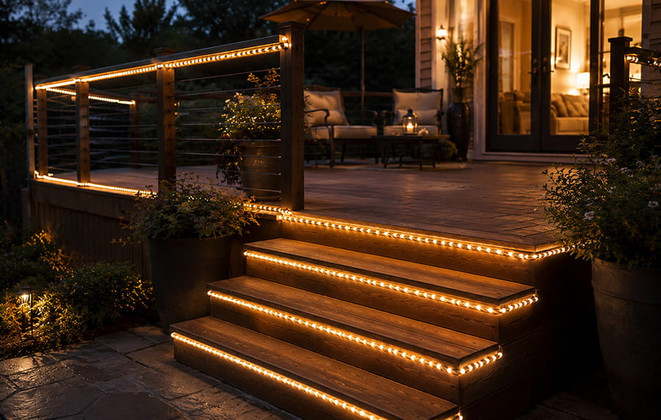
More and more people are choosing LED rope lights – and for good reason. LED lighting uses at least 75% less energy and can last up to 25 times longer than traditional incandescent lighting.' with 'Today's LEDs use up to 90% less energy and last up to 25 times longer than incandescent bulbs.With that growing popularity comes one common challenge: getting them installed correctly. That’s where we come in.
Below, we’ll walk you through the most common LED rope light installation mistakes to avoid, so you can get the most out of your lighting and have your project up and running in no time.
Common LED Rope Light Installation Mistakes
A successful installation starts well before the lights are mounted. A little planning can save you time, money, and frustration. Here are 7 common problems and how to avoid them.
1. Putting Your Lights in the Wrong Place
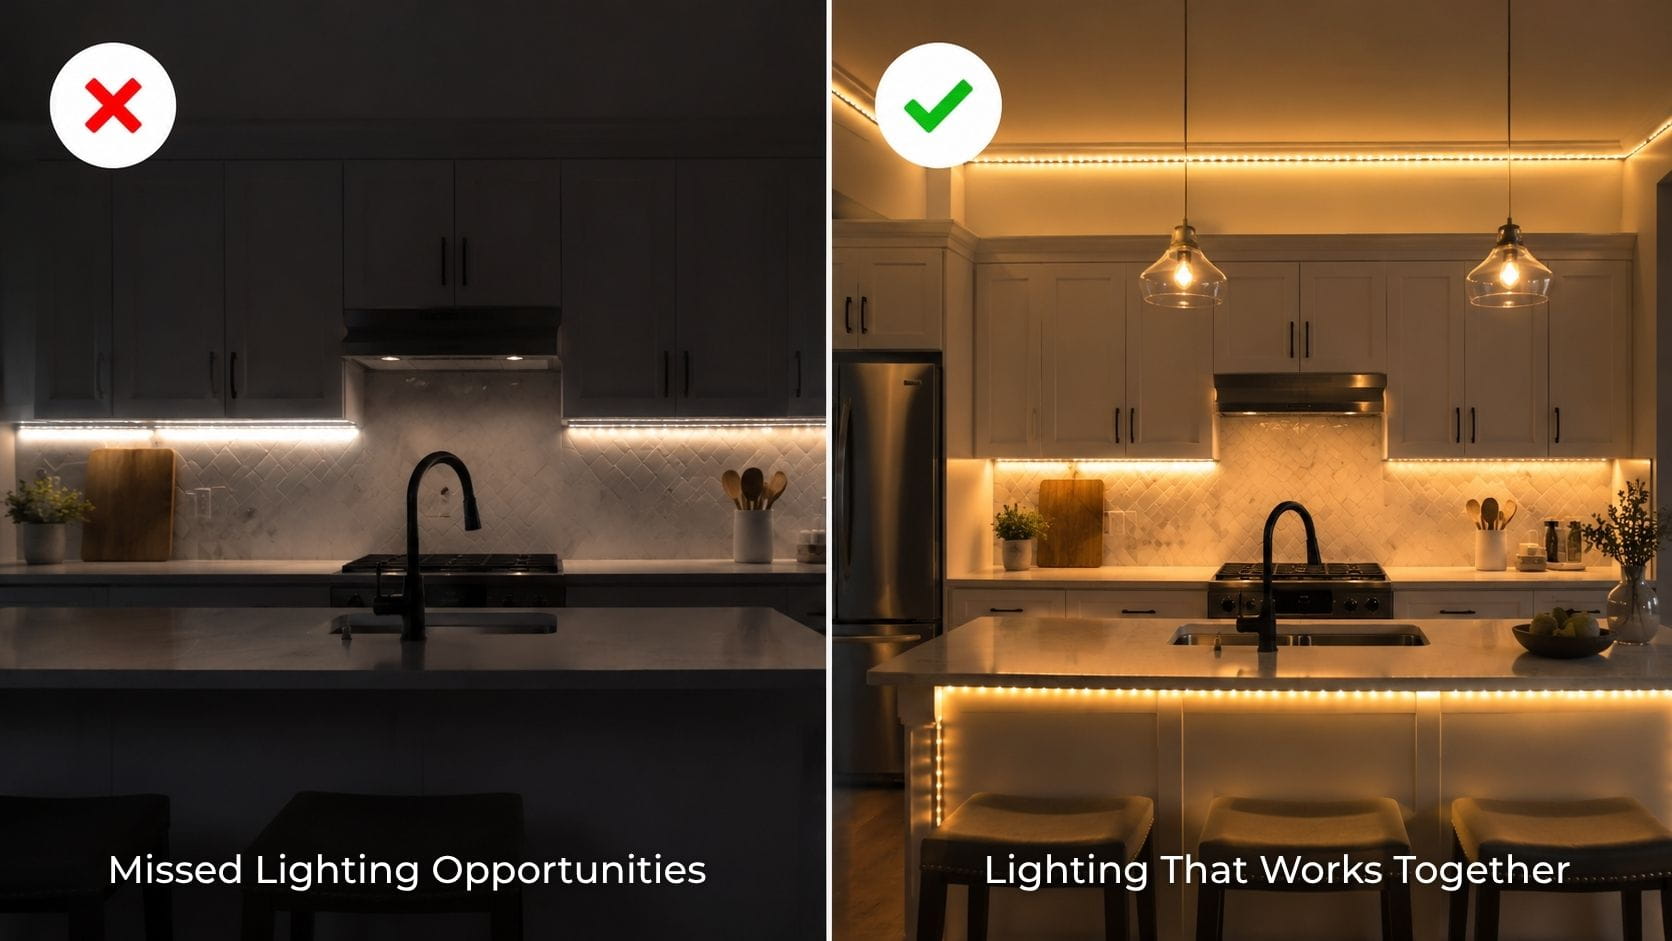
Lighting placement has a major effect on how a fi nished space looks and functions. Rope lights can provide a soft decorative glow, highlight architectural details, improve visibility, or help defi ne the edges of a deck, walkway, or landscape feature.
Before ordering your lights, decide:
- What you want the lighting to accomplish
- Where the rope light will begin and end
- Where the power source is located
- How the light will be mounted
- Whether connections will be exposed to moisture
If you’re looking for inspiration before you start, check out our 10 easy LED rope lighting ideas. Once you have a plan in mind, you can start buying and installing your LED rope lights with confi dence.
2. Choosing the Wrong Type of Light
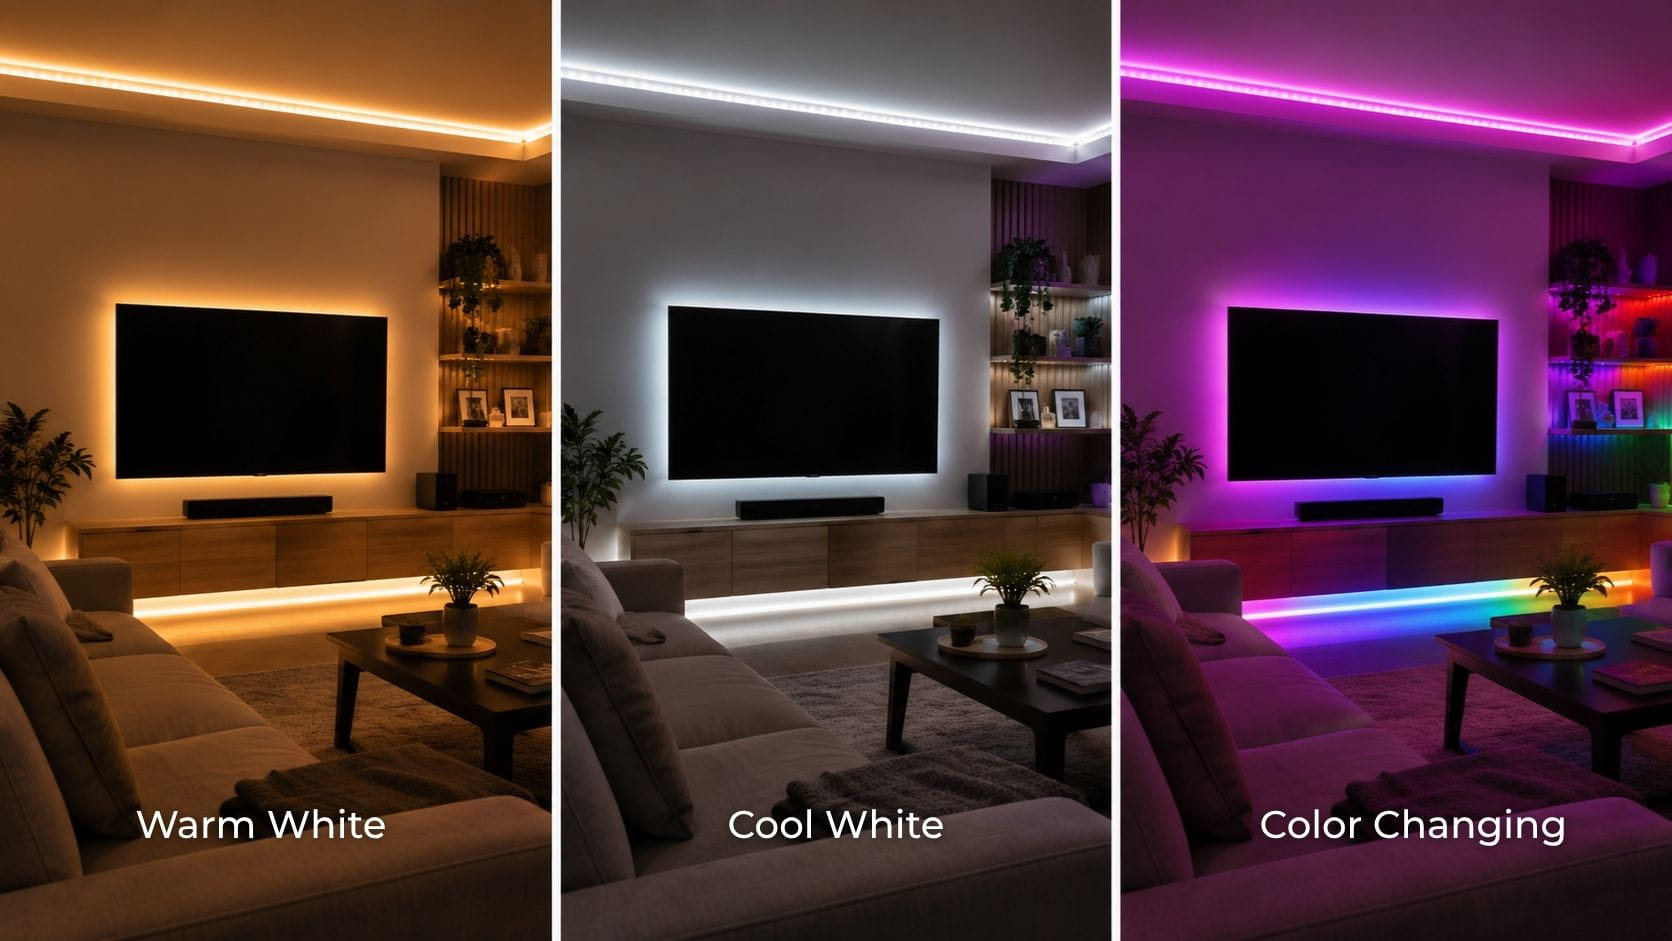
There are so many lighting options to choose from, so once you’ve thought about the design tips above, it’s time to decide on the color of light you want.
Creating a cozy space? Warm white rope lights are a great choice to make the space feel inviting after a long day.
Need brighter task lighting? Cool white rope lights are ideal for offi ces, workshops, or an area you need to focus and see things clearly.
Love to entertain? Color changing rope lights can create a fun, party atmosphere at the touch of a button.
You can also combine many of these features into the same lighting system and switch between them when you need to. Many LED lights can also be dimmed. Just make sure you decide what features you want before you buy, as they aren’t available for every type of LED light out there.
3. Forgetting to Budget for Accessories
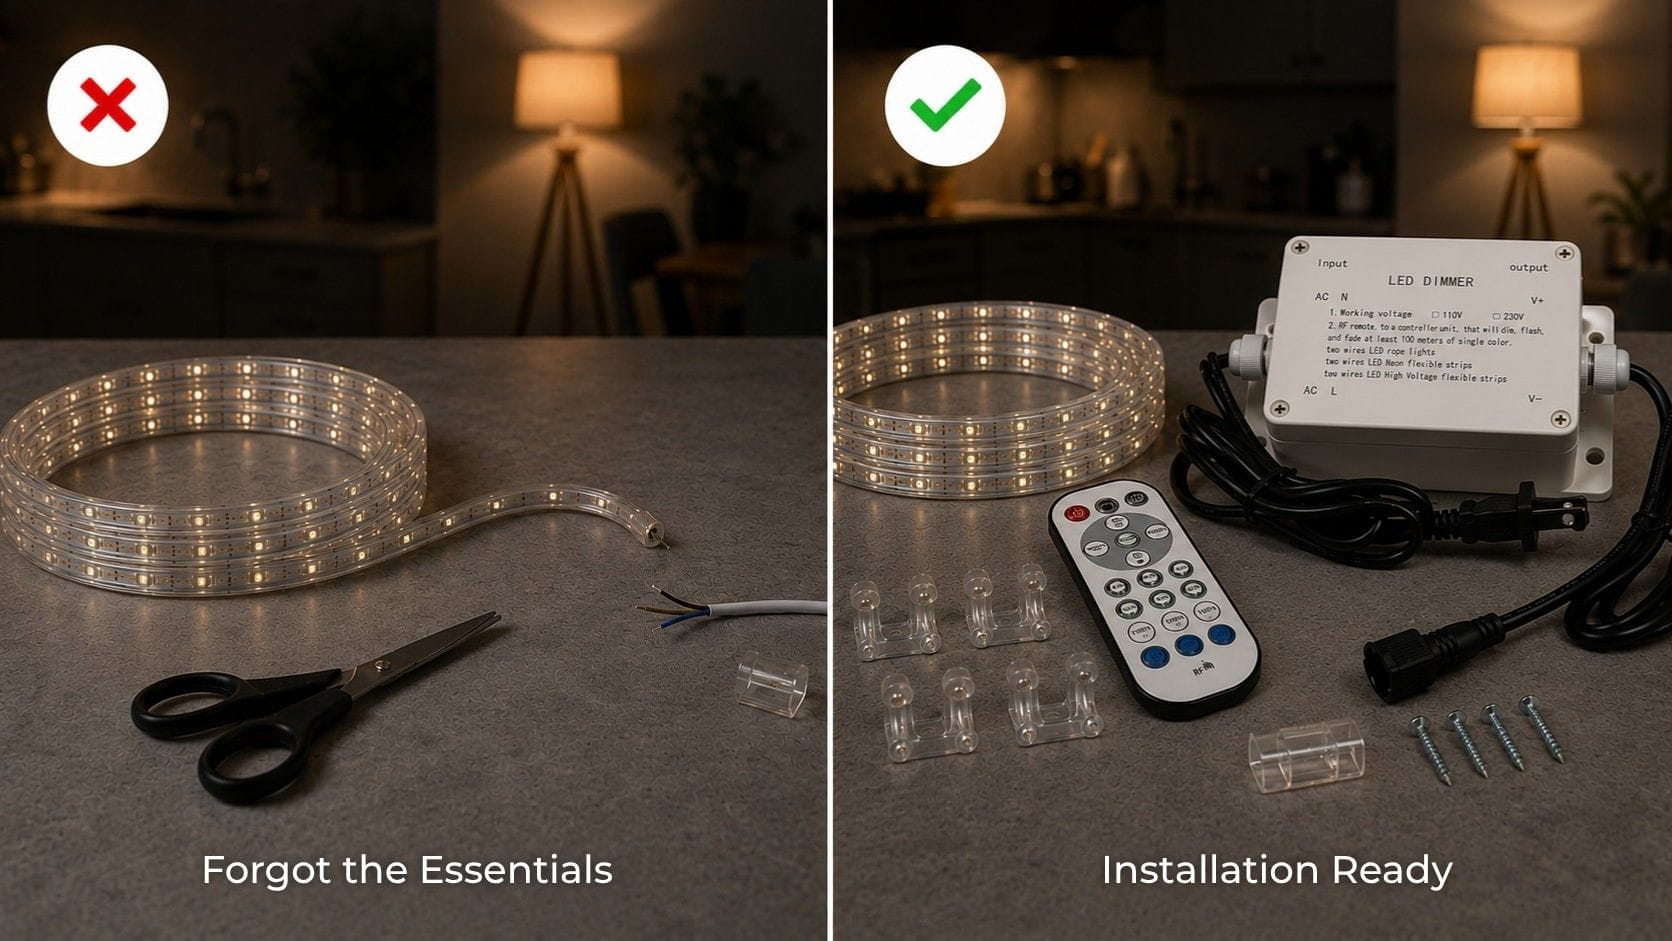
The rope light itself is only one part of the installation.
Depending on the product and layout, you may also need:
- A compatible power cord or power supply
- Mounting clips or track
- End caps
- Connectors or splice kits
- A dimmer or RGB controller
- Outdoor weatherproofi ng materials
Planning ahead means you can get your project done without having to stop halfway through. Before you start, make sure you’ve got all the LED rope light accessories.
4. Buying the Wrong LED Rope Lights
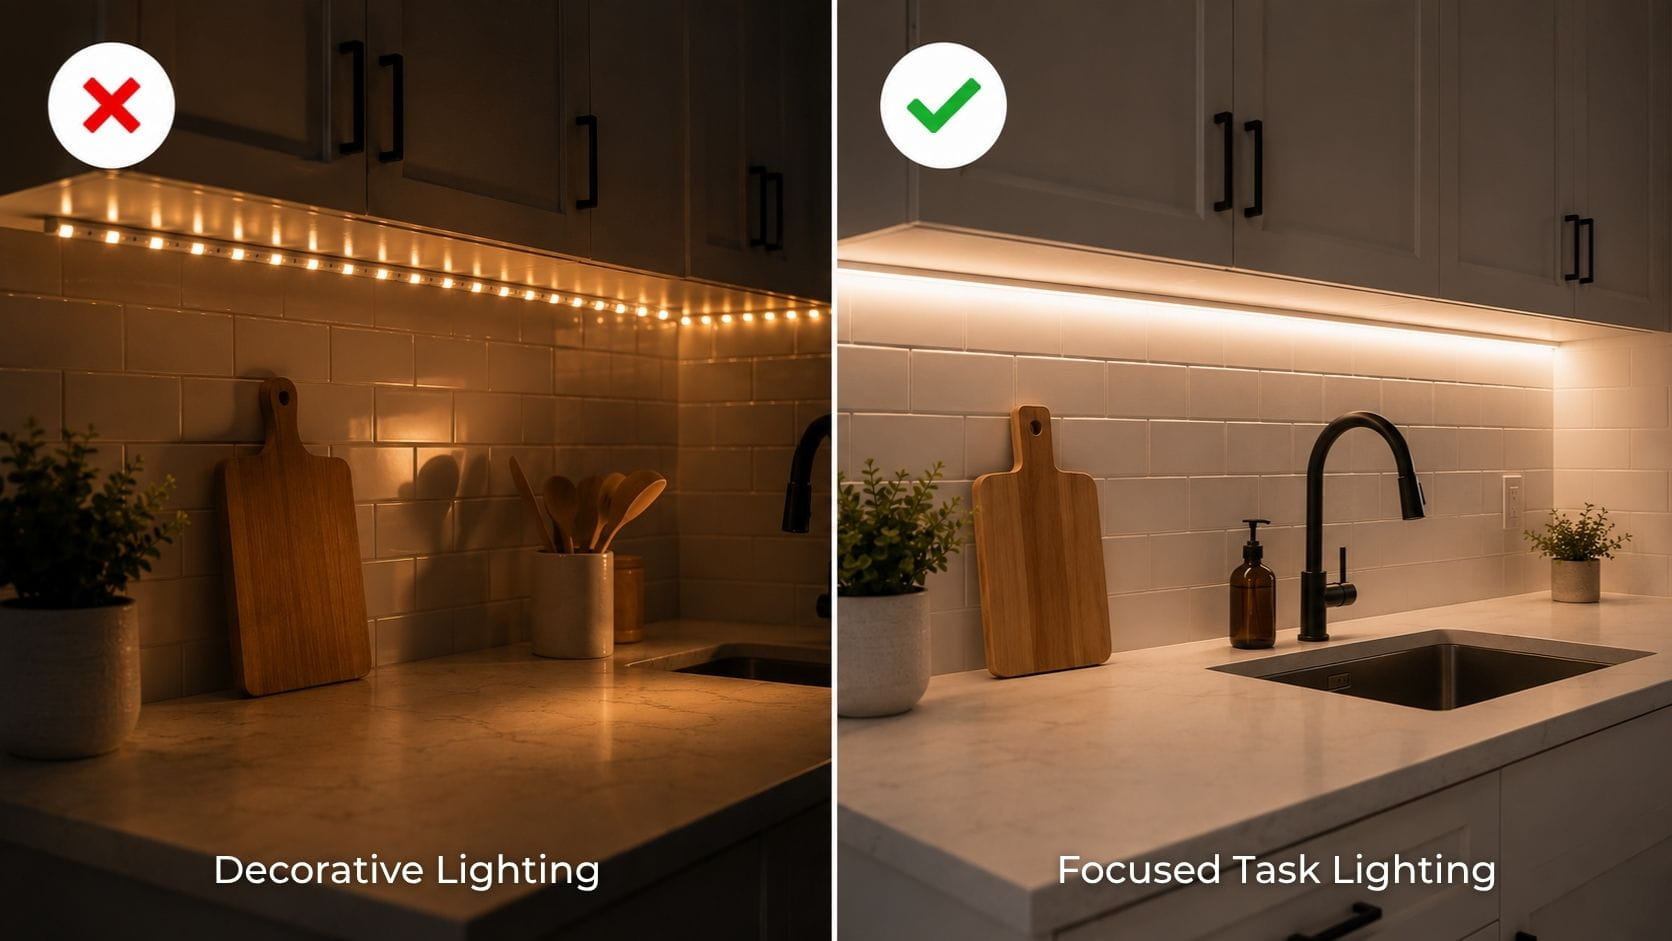
Rope lights are highly versatile, but they are not the best choice for every type of lighting project.
Because they emit light around much of the tubing, rope lights work especially well for:
- Outlining decks, patios, and walkways
- Wrapping posts, trees, or railings
- Creating landscape borders
- Adding decorative accent lighting
- Building seasonal displays
However, rope lights are thicker than LED strip lights and require a minimum bend radius. They should not be folded, sharply creased, or forced into tight 90-degree corners. If your goal is to illuminate a worktop or countertop, LED strip lights are often the better option because they direct light exactly where you need it.
LIY (Light It Yourself) Tip: For the dotless glow shown above, try FCOB strip lights which provide a seamless line of light.
5. Cutting Your Rope Lights in the Wrong Place
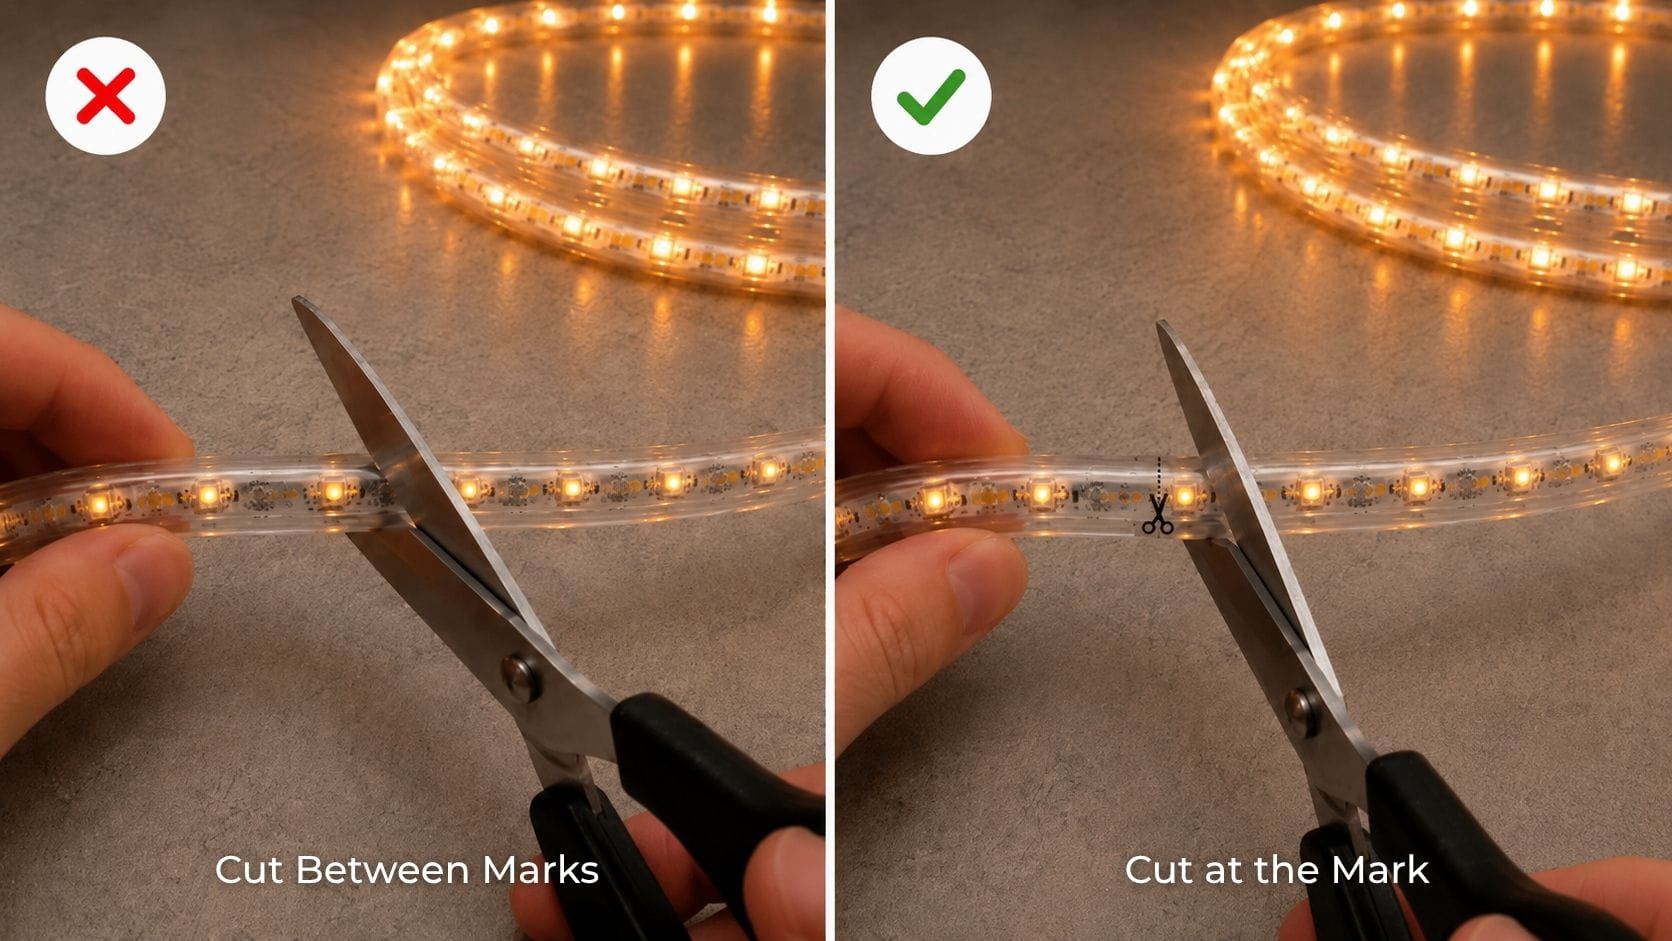
Like most LED lights, rope lights need to be cut at certain intervals. You can buy custom-cut rope lights , or purchase a longer spool and cut it down to the lengths you need.
Cutting intervals are evenly spaced throughout the rope and can range from every 5 to 39+ inches, depending on the type of rope light. Make sure you check the cutting requirements for your rope light, as they vary.
Cut points may be identifi ed by a printed line, scissors symbol, or a specifi c gap in the internal wiring. Always check the product instructions rather than assuming the markings are the same across different rope lights.
If you’re not sure how much rope light you need, try our Rope Light Calculator.
LIY (Light It Yourself) Tip: If you accidentally cut in the wrong place, rope light connectors can help get your project back on track.
6. Getting the Power Connection Wrong
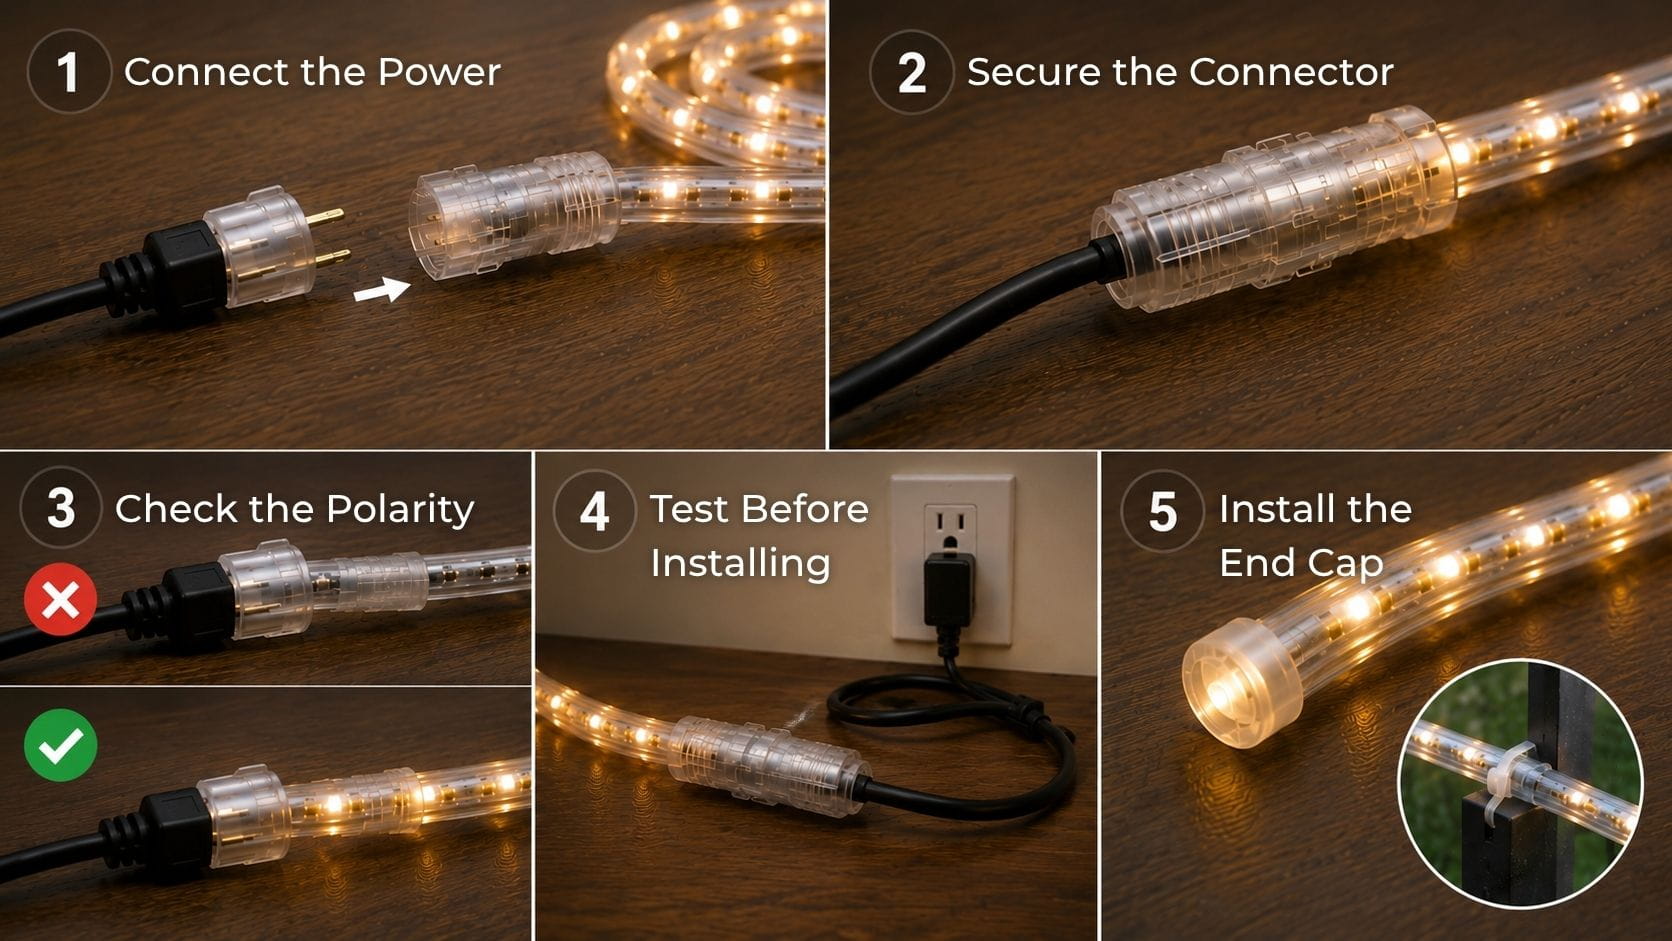
The power connection transfers electricity from the power cord or power supply to the rope light. A loose, misaligned, or improperly sealed connection can cause fl ickering, prevent the lights from turning on, or allow moisture to enter the tubing.
Follow the instructions provided with your specifi c product, but the general process is:
Step 1: Attach your power connector and power cord.
Step 2: Secure the connector to the rope. Be careful, but be firm. All the connections need to be tight and secure.
Step 3: Remember that LEDs are polarized, which means the electrical current can only fl ow in one direction. If your lights don’t turn on, you may have just connected the power cord to the wrong end.
Step 4: Before you start mounting your lights, plug them in and make sure everything is working. It’s much easier to fi x a connection before the rope light is installed.
Step 5: Secure the end cap, especially if your lights are going outdoors. You don’t want any water getting in or any wires hanging out.
Remember:
- Some LED rope lights are directional because of their electrical design. If the light does not turn on, disconnect it from power and confi rm that the power connector is attached to the correct end and in the proper orientation.
- Testing the full length before installation is essential. Connections are much easier to inspect and correct while the rope light is still accessible.
- For outdoor projects, every fi eld-installed power connection, splice, and end cap should be weatherproofed according to the manufacturer’s instructions.
7. Choosing the Power Supply or Controller
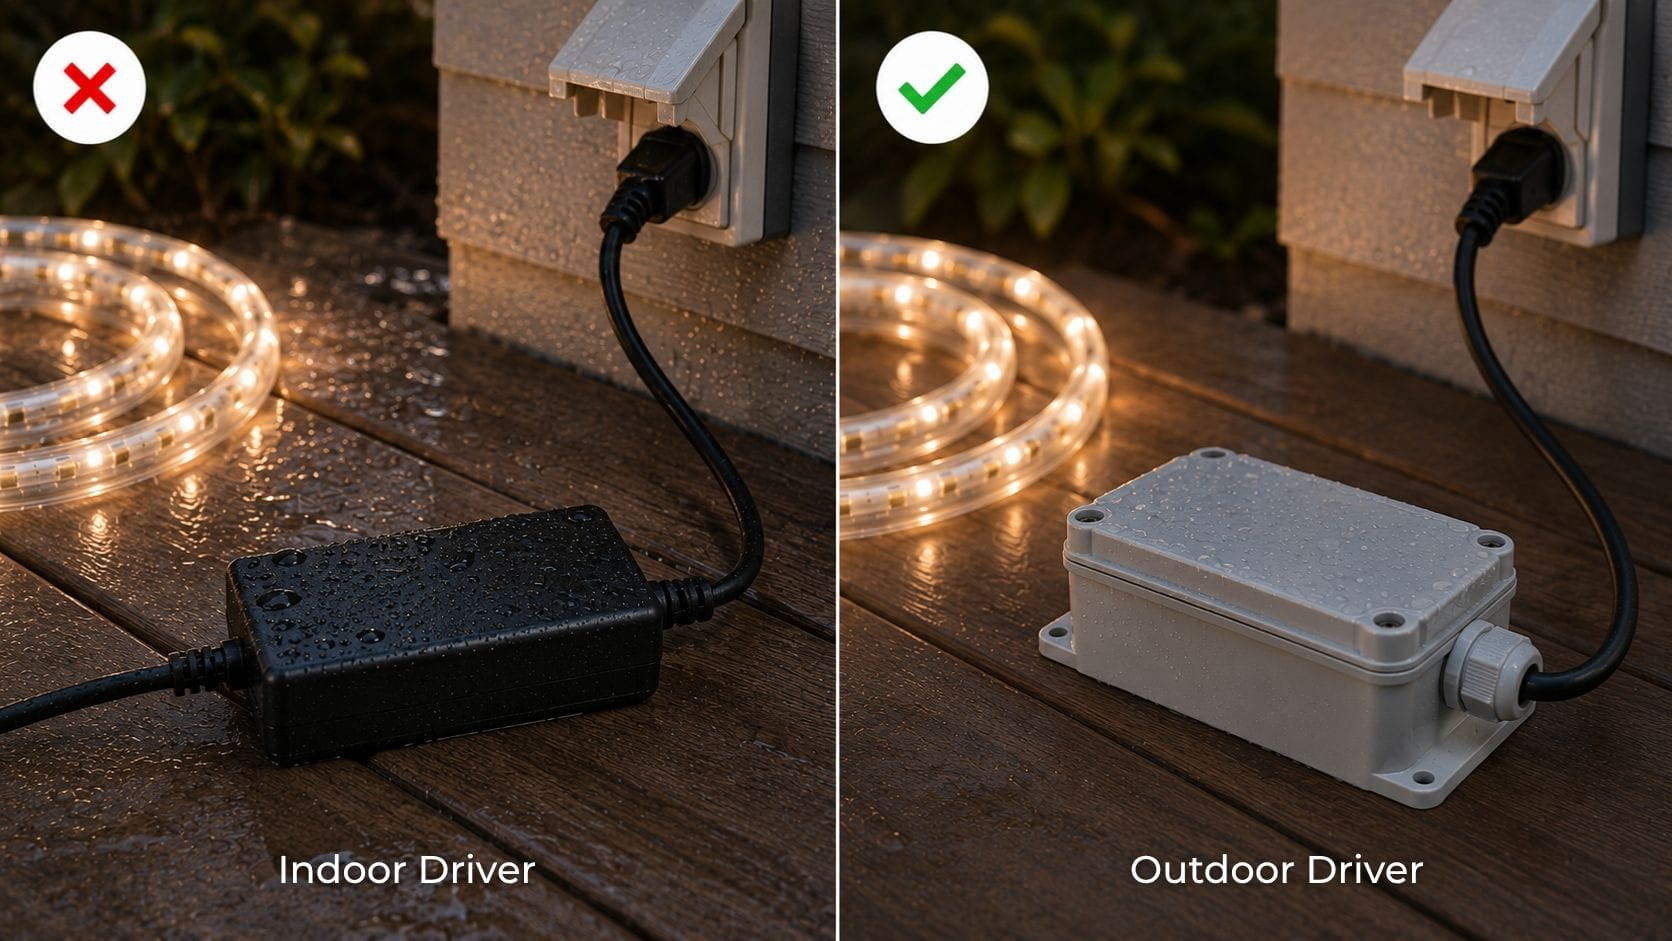
For outdoor installations, choose an outdoor-rated controller or place it in a properly protected location. All power connections, connectors, and cut ends should also be sealed to keep moisture out.
Before plugging anything in, double-check that your power cord, connectors, and controller are made for your specific rope light. Using incompatible components may keep the lights from working properly or damage the product.
If you’re unsure what your project requires, our team can help you choose the right dimmable or outdoor controller for your setup.
Controllers regulate the supply of power to your LED rope lights. They switch the power from your main plug socket into a lower voltage, which is suitable for LEDs. If you want to dim your lights, you’ll need a dimmable controller. If your lights are going outdoors, you’ll need a water-resistant controller. All power connections, connectors, and cut ends should also be sealed to keep moisture out.
Install With Confidence
You now know how to avoid the most common LED rope light installation mistakes. If you’ve considered everything from choosing the right lights and planning your layout to cutting and connecting them correctly, you should be good to go.
Ready to get started? Browse our LED Rope Lights to find the right fit for your project. If you need a hand choosing the right products or have questions about installation, contact us and we’ll be happy to help.
Sources
- U.S. Department of Energy: LED Lighting